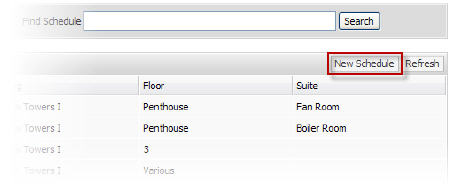
1. Go to Control Panel > Building Services > Preventive Maintenance > Schedules
2. In the Filter section, click the Property field and select the desired property.
3. Click New Schedule.
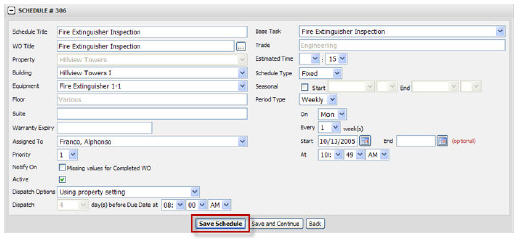
4. Click the Schedule Title field and enter a title for the schedule.
5. Click the WO Title field and enter a title for all subsequent work orders generated from this schedule.
Note:
• You can copy and paste the title from the schedule Title field if you wish. Avoid using nick-names for the work order title to ensure that all work orders are easily identifiable. Alternatively, if all Tasks have been added and saved to this schedule, click the '.' icon and the system will enter the name of the longest period task listed on the schedule.
6. Click the Equipment field and select the related equipment from the drop-down list. The system automatically enters the floor and suite into the schedule based on the equipment selected.
7. Click the Assigned To field and select the employee or vendor. This field is optional. It is not recommended for properties where employees and vendors change often. Assignment can also be selected once the work order is generated.
8. Click the Priority field and select a level of priority for this schedule, with 1 being high, and 5 being low.
9. If subscribers should be notified of missing values for work orders associated with this schedule, click the Notify On checkbox to select it. Refer to the employee profile when setting up notifications.
10. If auto-dispatch is being used for this property, you have the option to use the default setting (as entered on the Dispatch Options screen) or enter another setting for this particular schedule. If auto-dispatch is not turned on, this area is grayed out.
11. To use the property setting:
a. Ensure a property setting is selected from the Dispatch Options dropdown.
b. Click the Time fields and select the time of dispatch.
12. To override the property setting for this schedule:
a. Select Using Schedule Setting from the Dispatch Options drop-down.
b. Click the Day field and select the number of days before the Due Date that this Schedule should be dispatched. You can select up to 30 days in advance; however, if this is a daily or weekly schedule, be aware that the higher the number of days selected, the more mobile devices may be overloaded with work orders.
c. Select the Time fields and set the time of dispatch.
13. Click the Base Task field and select a task to associate with this schedule. The base task determines frequency of work order generation; therefore, the task that is done the most frequently must be entered as the base task. See Tasks for more information. Note that the trade associated with the selected task is entered by the system.
14. Click the Estimated Time field and select the approximate time that this schedule will take to complete. This is a mandatory field which relates to reports.
15. Click the Schedule Type field and select the type of schedule. See Types of Schedules for more information.
16. If the Schedule is seasonal, click the Seasonal checkbox to select it. Click the Start and End Date fields to select the dates which define start and end of the Season.
Notes:
• Seasonal - If tasks are to be completed only during a certain time of the year, specify the time by entering the start and end of the season. Work orders will only be generated if the next scheduled date falls within the defined season.
• If the next scheduled date falls outside of the season, Axis will adjust the date to the start date of the next season.
17. Click the Period Type field and select the period type. Depending on the period type selected, click the Time and Date fields and select this information. Tasks can be assigned up to 10 years out (120 months).
18. Click Save Schedule. The schedule is saved, and all associated work orders are regenerated.