Overview:
The following is a basic overview on updating the various sections of a work order. For more detailed information on editing work orders, please refer to the additional topics within this section.
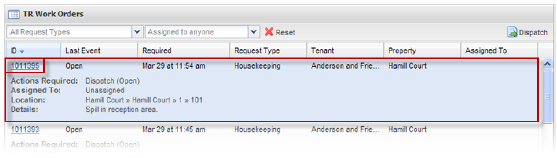
1. To update a Tenant Request work order, first locate the work order you would like to update. See Finding TR Work Orders for additional details.
2. Once you have located the work order you would like to update, click on the work order number, or double-click on the work order's row.
3. If another user is currently editing the work order, you will receive a warning (example below):
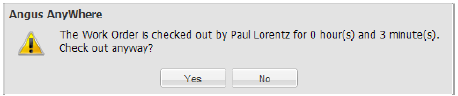
4. If you receive this message, click Yes to proceed, or No to return to the work order list.
5. The work order is displayed.
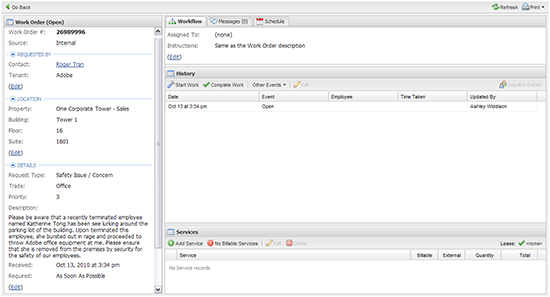
6. The Refresh and Print buttons are located in the top-right corner of the screen.
• Selecting Print will print a copy of the work order.
• Selecting Refresh will reload the information in the work order, displaying any changes which may have been made since the time it was originally opened (or last refreshed).

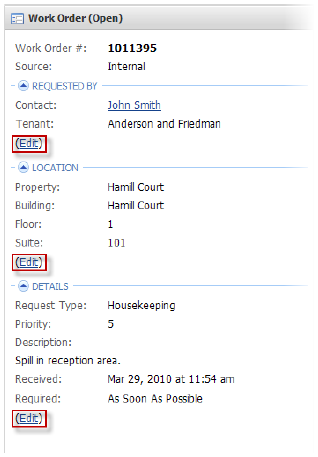
7. To the left, the work order details are displayed. To edit a section of the work order details, click on the Edit link which corresponds to the section of the work order details which you would like to modify.
• Hovering your mouse pointer over the name in the Contact field will display a popup containing detailed contact information.
8. In the popup window that opens, modify the information as needed and click Save.
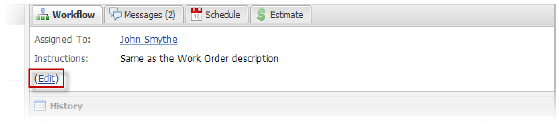
9. The Assign and Dispatch section is located under the Workflow tab to the top-right. To modify this information, click the Edit link.
• Hovering your mouse pointer over the name in the Assigned To field will display a popup containing detailed contact information.
10. In the popup window that opens, modify the information as needed and click Save.
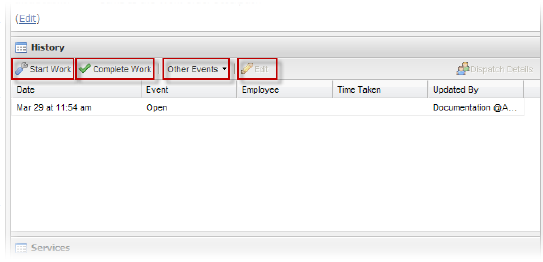
11. The History section is located below the Assign and Dispatch section. To add an event to the History section, click Start Work, Complete Work, or Other Events.
12. If you would like to edit an existing event, select the event and click Edit. Please note that not all event types can be edited.
13. In the popup window that opens, fill in the event details and click Save.
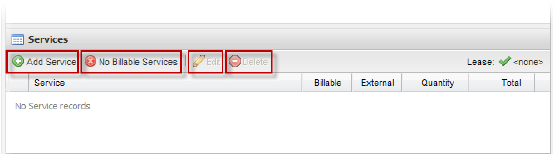
14. The Services section is located below the History section.
• To add a billable service, click Add Service. In the popup window that opens, use the fields provided to enter the service's details and click Save.
• To indicate no services will be recorded, click No Services.
• To modify a service that has already been added, select the service from the list, then click Edit. In the popup window that opens, modify the information as needed and click Save.
• To delete a service that has already been added, select the service from the list, then click Delete.