|
|
|
|
|
|
|
| |
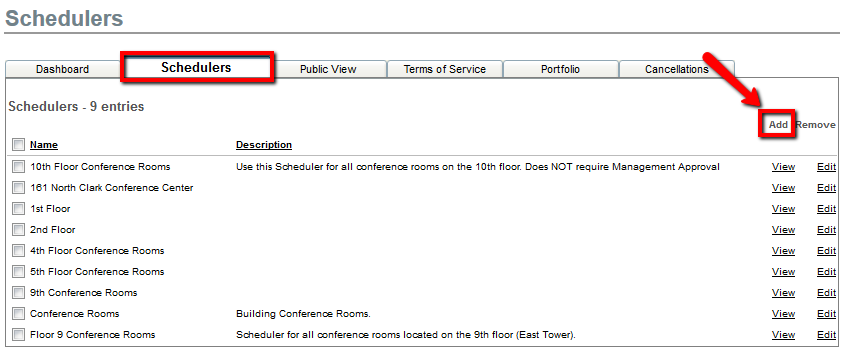
Control Panel > My Workspace > Schedulers > Schedulers Tab
Creating a Scheduler:
Note:
- First, we create a scheduler, which is more or less an umbrella for the resources and layouts. Therefore, a scheduler (i.e. 5th Floor Conference Rooms) holds the resources that can be booked (i.e. Conference Rooms 501, 502, 503, and 504).
- Go to Control Panel > My Workspace > Schedulers.
- Click on the Schedulers tab.
- Click on Add.
- Fill in the Attributes for the scheduler:
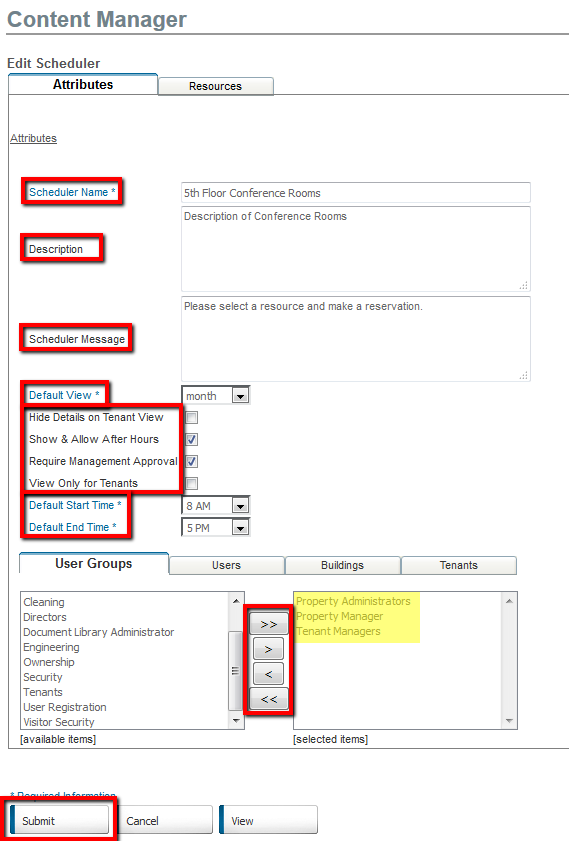
- Scheduler Name: Name for the scheduler.
- Description: Description of the scheduler. Tenants will not see this description and it is mainly used for internal use only.
- Scheduler Message: Will display for tenants on the calendar view.
Note:
- This can be a note to the tenants, such as: "Please contact management if you have any questions."
- Default View: Will open the calendar in the selected view (day, week, or month).
- Hide Details on Tenant View: Prevents tenant users from being able to view the details of other tenant users' requests.
- Show & Allow After Hours: Allows tenants to make a reservation outside of the resources' start and end times.
- Require Management Approval: If selected, then a staff member (i.e. Property Manager) must approve the reservations; otherwise, if this is unchecked, the events will automatically be approved.
- View Only for Tenants: Allows tenants to only view current reservations and does not allow them to make a reservation themselves. All reservations will need to be made by the staff only.
- Default Start/End Time: This will be the default time range availability for all resources within the scheduler.
- Permissions: Select the User Group(s), User(s), Building(s), and/or Tenant(s) that can access the scheduler via the My Workspace page.
- Click on Submit to save the scheduler.
Note:
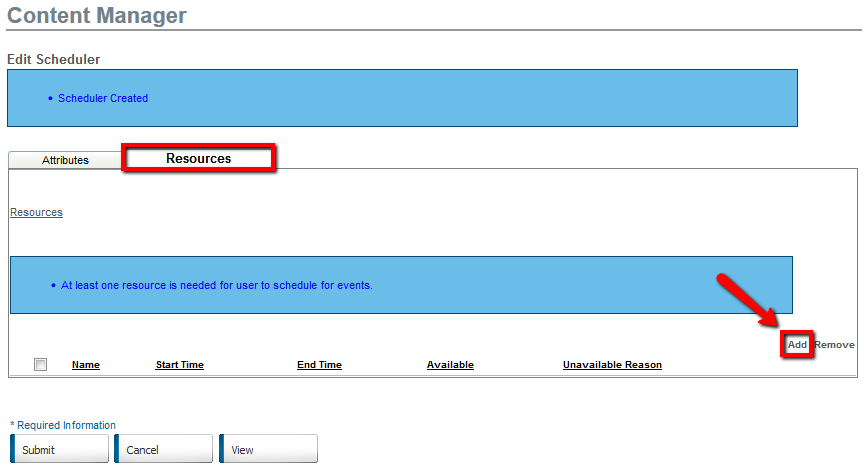
- Before a scheduler can be viewed from the My Workspace page, at least one resource must be added.
- Recall that we first had to create the scheduler, which is more or less an umbrella for the resources. Therefore, a scheduler (i.e. 5th Floor Conference Rooms) holds the resources that can be booked (i.e. Conference Rooms 501, 502, 503, and 504).
- Click on the Resources tab.
- Click on Add.
- Fill out the Resource Attributes:
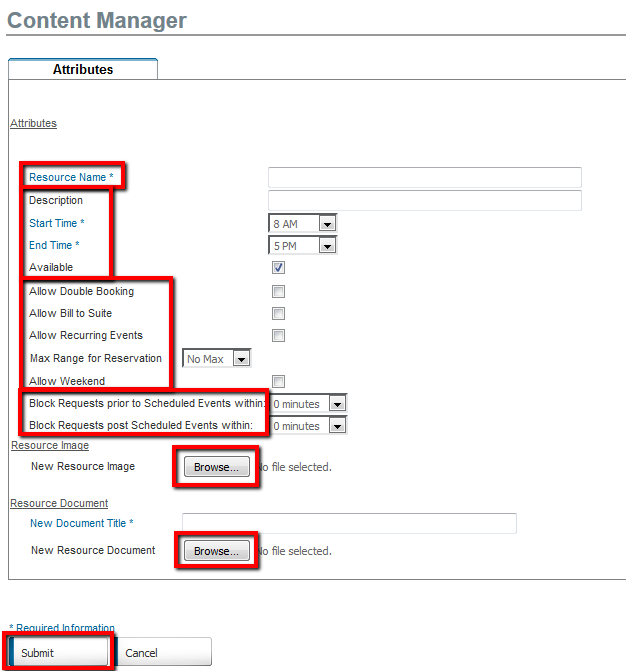
- Resource Name: Name of the resource.
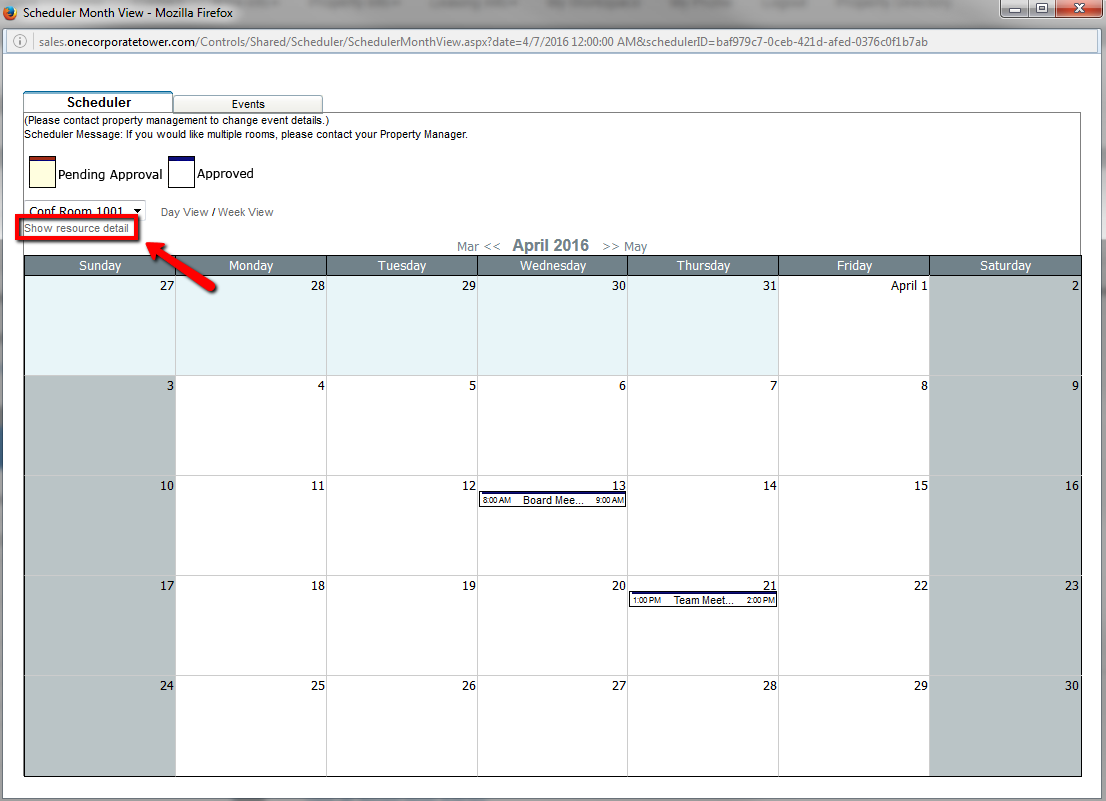
- Description: Description of the resource. This will be shown to Tenants only when they view the scheduler from My Workspace, select the resource from the dropdown, and click on Show Resource Detail. This is not shown when viewing the calendar from Control Panel (for staff members).
- Start/End Time: Time range availability for the resource. This is restricted to the default start/end time of the scheduler.
- Available: Allows the resource to be available for users to make reservations. If, for some reason, the resource becomes unavailable (i.e. construction, etc.), then you can temporarily make it unavailable rather than deleting the resource.
- Allow Double Booking: Allows multiple events to be scheduled for the resource during the same time period.
- Allow Bill to Suite: Allows a staff member (i.e. Property Manager) to select a different suite to bill to when creating a scheduler request on behalf of a tenant user.
- Allow Recurring Events: Allows users to create recurring events.
- Max Range for Reservation: Restricts how far out a tenant user can make a reservation request.
- Allow Weekend: Allows weekends to be available for booking.
- Block Requests prior to Scheduled Events within Set Time: Blocks out a set time before scheduled requests to allow for setup time. Does not allow other tenant users to schedule a request during the blocked time.
- Block Requests post Scheduled Events within Set Time: Blocks out a set time after scheduled requests to allow for take down time. Does not allow other tenant users to schedule a request during the blocked time.
- Resource Image: Allows staff members to upload a picture(s) of the resource. The picture(s) will be shown to Tenants only when they view the scheduler from My Workspace, select the resource from the dropdown, and click on Show Resource Detail. This is not shown when viewing the calendar from Control Panel (for staff members).
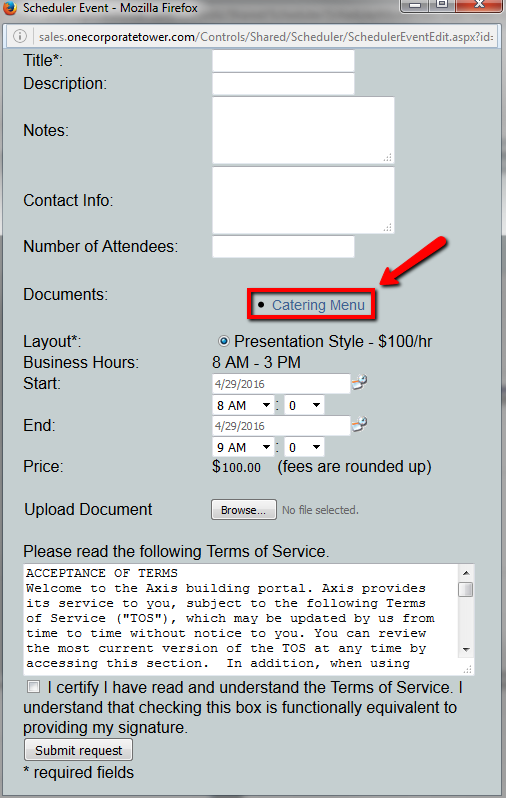
- Resource Document: Allows staff member to upload resource documents for the users (i.e. forms, rules, regulations, instructions, etc.). Users will be able to view these documents after clicking on a day in the resource calendar to book a reservation.
- Click on Submit to save the resource.
Note:
- You can create multiple resources per scheduler. Therefore, if you need to make another resource for the scheduler, then follow the steps again.
|
|
Last Updated: April 14, 2016
|
|
|
|
|