Axis Portal  


Help Section
3501 Jamboree Rd., Suite 100
Newport Beach, CA 92660
http://help.axisportal.com/
 
Table of Contents
  • Home
    • CONTROL PANEL
      • Work Order
      • Setup
      • Content Manager
        • Area Information
        • Available Space
          • Leasing Message
          • Leasing Documents
          • Available Space
            • Add Available Space
            • Edit Available Space
            • Remove Available Space
            • Interactive Stacking Plan
            • How It Works
            • Creating a new Interactive Stacking Plan
            • Editing an Interactive Stacking Plan
            • Removing an Interactive Stacking Plan
            • Attaching availabilities to an Interactive Stacking Plan
        • Contact Section
        • Directions
        • Handbooks
        • Homepage
        • Photo Gallery
        • Property Information
        • Register Me
        • Sustainability
        • Weather
      • My Workspace
      • Document Library
      • Communication
      • Reports
      • Lease Intelligence
    • ANGUS ANYWHERE MOBILE
    • AXIS DOCUMENTS & INFORMATION
    • COMMON QUESTIONS
    • CONTACT US
       
          Help Section          

Creating a new Interactive Stacking Plan
 

Creating a new Interactive Stacking Plan:

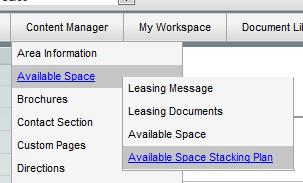
1.    Hover over Content Manager
2.    Hover over Available Space
3.    Click on Available Space Stacking Plan


   Note: If you do not see this option, please contact an Axis Administrator via Service Now.


4.    Locate the building you'd like to create an interactive stacking plan for
5.    Click Edit
6.    Ensure your image is less than 1000 pixels tall and less than 750 pixels wide
7.    Click Browse and locate the images saved on your device
8.    Click Open
9.    Click Submit


10.    Click Create
11.    Select the floor you'd like to create a stacking plan for and click Submit


12.    Click on the image to draw points for the floor you selected (press Ctrl + Z on keyboard as
          needed to undo any steps)


                 (Drawing) 


                 (Drawing more points)


                 (Drew all points)


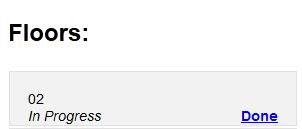
13.    When finished, click Done


Tip: We recommmend drawing one floor quickly wihtout paying attention to details. Doing this will 
        help familiarize yourself with drawing floors.

14.    If you'd like to add more floors, repeat steps 10 - 13
15.    If you would like to adjust the points for any floor, click Edit
16.    If you'd like to delete a floor you drew, clikc Delete
17.    When finished adding floors, click Save All
18.    You will see a Floors Saved notification if your drawings were saved correctly

Last Updated: November 27, 2013