Images that you wish to use in your Portal’s pages are uploaded through the RadEditor into an Image Manager where they are stored in our AXIS database for safekeeping and future use. Images only need to be uploaded into the Image Manager once and can then be used throughout your Portal’s various sections (i.e. Images uploaded in the Handbook RadEditor can be used again in the Area Information RadEditor per step #9 of this help section.)
Notes:
• If you wish to use an image that you had previously uploaded, DO NOT upload the same file again. If a newly uploaded image contains an identical file name to one that has already been uploaded to the Image Manager, the existing image will be replaced, and all links to that image will be broken.
• Images uploaded into the Image Manager CANNOT be accessed through the Photo Gallery, or vice versa.
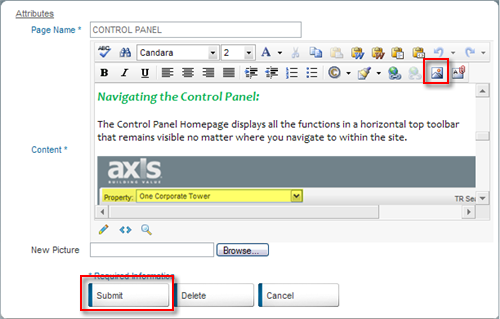
1. From any RadEditor, click on the  icon.
icon.
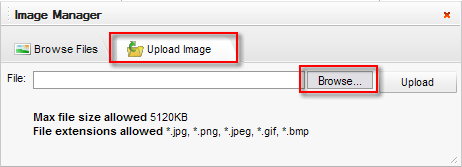
2. The Image Manager opens up.
3. To upload a new image, click on the Upload Image tab.
4. Click Browse.
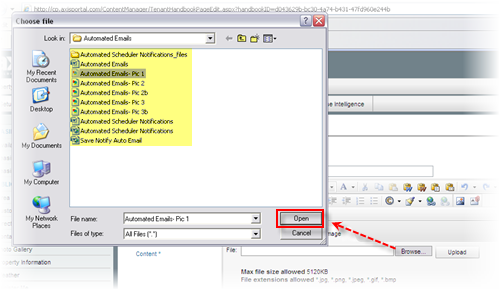
5. Using the pop-up window, locate the image file you wish to upload from your local hard drive or network.
Notes:
• Compatible image files include: *.jpg, *.png, *.jpeg, *.gif, *.bmp
• Maximum individual file size: 5120 KB; 5 MB
6. Click Open.
7. The Image location will be listed in the dialogue box. Click Upload.
Important Note:
• Before uploading, ensure that a file with an identical name has not already been uploaded.

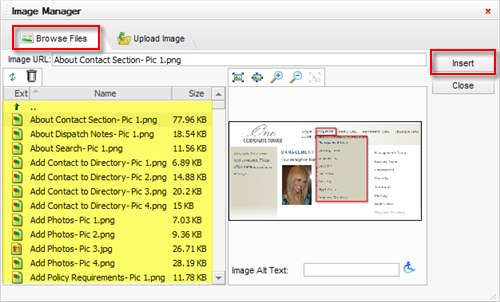
8. The Image will be added to the list under the Browse tab. If not automatically redirected to the Browse tab, click it.
9. The newly uploaded image will automatically be selected, if not, locate it from the list and click Insert.
Note:
• It is best to resize or crop images to a desired size using a third party image editing software before uploading to the Image Manager.
10. Once finished, click Submit on the page you are adding the image to.