1. Click Control Panel > Work Order > Tenant Requests > New Work Order or the (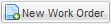 ) button from any of the applicable TR Lists as seen below.

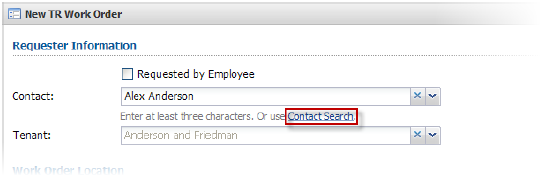
2. The New TR Work Order screen is displayed.
3. If you do not have call center mode enabled but would like to use the Contact Search interface, click Contact Search (otherwise, proceed to Step 6). If you have call centre mode enabled, you will be taken to the Contact Search screen first, as described in Step 4.
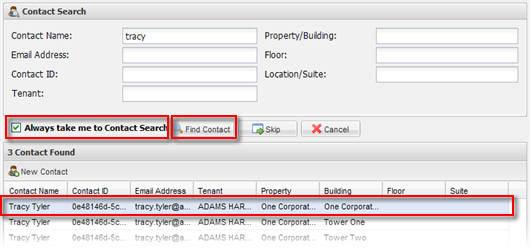
4. If you have call center mode enabled, you will be taken directly to the contact search screen. To locate a contact, fill one or more of the provided fields and click Find Contact. Next, double-click a contact in the Contacts Found section to proceed to the next step. If the contact's name is already known, you can optionally click Skip and proceed to the next step.
• You can also enable or disable Call Centre mode by checking or unchecking Always take me to Contact Search first on this screen.
Note:
• You must enter at least 3 characters in to one of the following fields: Contact Name, Email Address or Contact ID. All other fields are optional.
5. Once you have double-clicked on a contact, or if you do not have call center mode enabled, you will be taken to the New TR Work Order screen.
6. If the Work Order has been proactively reported by an employee, click Requested by employee, then click on the drop-down menu and select the employee.
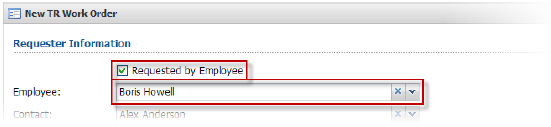
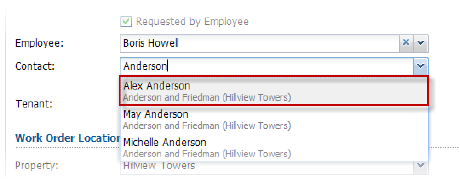
7. Click the contact field, and enter the contact's name (this information will already be filled in if you made use of the Contact Search screen described above). After entering at least three letters of the contact's name, you will be presented with a drop-down list of possible matches. Select the appropriate contact from the list.
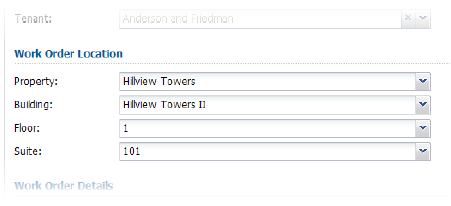
8. Once a contact has been selected, the Tenant and Work Order Location fields are automatically filled in. If needed, the work order location can be overridden by using the drop-down menus provided.
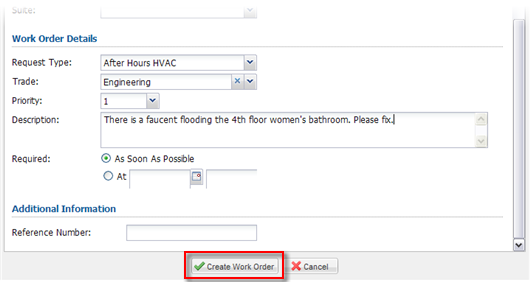
9. Next, scroll down to the Work Order Details section.
10. Using the fields provided, select a Request Type, Trade and Priority.
11. Next, fill in a description for the work order.
12. In the Required section, select either As Soon as Possible or At and use the menus provided to select a date and time that the work is required.
13. When you are finished, click Create Work Order.
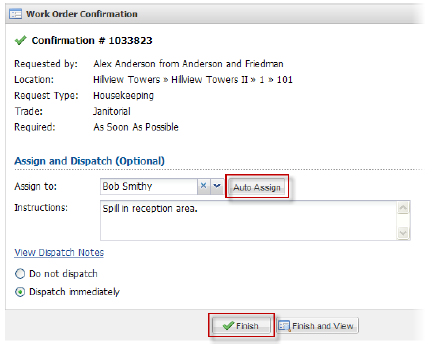
14. The Work Order Confirmation screen is displayed. This contains a summary of all information entered.
15. You can assign the work order from this screen either by selecting an employee from the drop-down list, or by clicking Auto-Assign. The auto-assign feature will attempt to assign the work order based on your routing table.
16. If there are any dispatch notes, they will be listed beneath the Instructions field.
17. Depending on when the work was required, you will have the following dispatch options to choose from:
• If the work order is required immediately, you can select either Do not dispatch or Dispatch immediately.
• If the work order is required at a future date, you can select either to dispatch the work order a certain number of days and hours in advance, or to dispatch immediately.
18. Click Finish to complete the process and return to the work order lists, or Finish and View to instead display the newly-created work order.