Control Panel > Content Manager > Photo Gallery
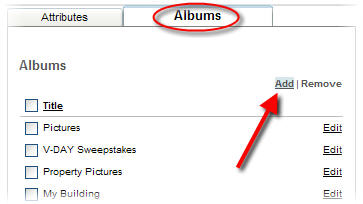
1. Click on the Albums tab.
2. Click on Add on the top right.

3. Type in the Title of the new album.

4. Select Public to display the album on the public portal for all current and prospective tenants to view. Leaving this option unchecked will allow only private users to view the album (such as photos of private building events).
5. Click Save. Your newly created album(s) will appear as a list on the Albums page.
Note:
• Photos can be added at the same time as the creation of a new album. To do so, proceed to the Adding Photos Section.