Axis Portal  


Help Section
3501 Jamboree Rd., Suite 100
Newport Beach, CA 92660
http://help.axisportal.com/
 
Table of Contents
  • Home
    • CONTROL PANEL
      • Work Order
        • Property Inspection Checklists
        • Dashboard
        • Messages
        • Tenant Requests
        • Preventive Maintenance
        • Visitor Security
        • COI (Certificate of Insurance)
          • Tenant COI
          • Vendor COI
          • Setting Up COI Management
          • Using COI Management
            • Adding a COI
            • COI Details
            • Policies and Compliance Tab
            • Messages Tab
              • COI Expiry Notification
              • Messages
                • Sending a Message
                • Replying to Messages
                • Adding Attachments to COI
                • Marking Messages as Read/ Unread
              • Using Notes
              • Using Reminders
            • History Tab
            • Renewing a COI
            • Deactivating a COI
            • COI and Assigning Work Orders
        • Property Inspections
        • Surveys
        • Search
      • Setup
      • Content Manager
      • My Workspace
      • Document Library
      • Communication
      • Reports
      • Lease Intelligence
    • ANGUS ANYWHERE MOBILE
    • AXIS DOCUMENTS & INFORMATION
    • COMMON QUESTIONS
    • CONTACT US
       
          Help Section          

Sending a Message
 

You can manually send custom, template-based messages with attachments via the Messages tab.


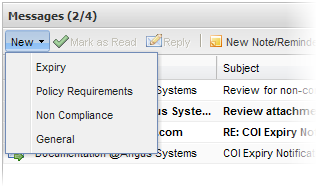
1.       Click New, and select a message type from the list provided:

         Expiry: send an expiry notification manually.

         Policy Requirements: send a request for new policy documents (attaches policy requirements document)

         Non Compliance: send a non-compliance notification.

         General: send a custom message that does not use a template.


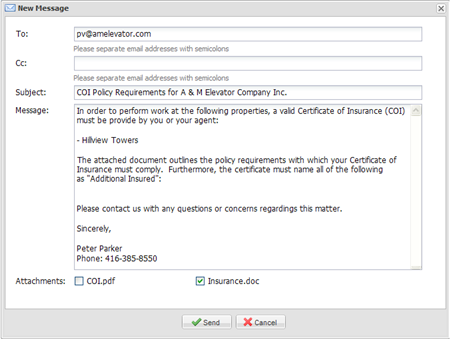
2.       The New Message window will open. By default, the COI contact listed for the vendor or tenant is auto-filled. You can edit the To and Cc fields as desired; please note that to enter multiple email addresses into the To or Cc fields, additional email addresses must be separated with semicolons (;).

3.       The Subject field is auto-filled based on the template type you selected (or blank if the General message type was used). You can edit this field as necessary.

4.       The Message field is also auto-filled based on the template type you selected (or blank if the General message type was used). You can edit this field as necessary.

5.       The default settings for what attachments will be sent are based on your attachment settings, defined in the Attachments section of the Policy & Compliance tab as well as in your COI Expiry Notifications options in the Messages tab. You can override these defaults by placing or removing the checkmarks beside each document listed.

6.       Click Send.


Last Updated: April 22, 2011